Skip to content

Archive for

Mimi Mac’s Peach Cobbler

Tonight I had peach cobbler for the third time in a week.

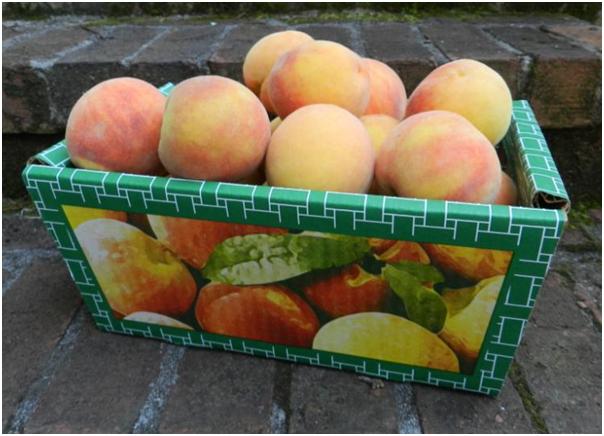
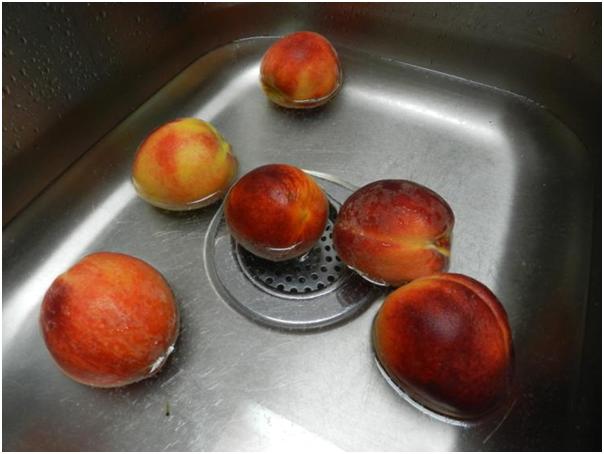
That’s because, last week was spent with my in-laws in Thomaston, Georgia, where the hospitality and the peaches are in a league of their own. My father-in-law is a pillar of the community in his own right, but he also descends from a dignified line of peach farmers from that area. The family peach business is a thing of the past, but he grew up knowing peaches. On Saturday he and his brother drove to a nearby town (Woodbury) to track down what they considered a suitable box for me to take back to my brother’s house in Virginia the next day. They said the fruit would be ripe when I arrived and they were right. They are perfect right now and I’ve eaten so many that my mouth is sore.

This is the box they hand selected for me. Aren’t they beautiful?

During our visit, Charlotte (known to my children as Mimi) made two cobblers. She got going so fast on the first one that I missed getting any pictures of it. But I was on my toes for the second one, which included a few blueberries from Barney’s brother’s bushes. The recipe is from her mother, my husband’s maternal grandmother, who was a sweet and spicy little slip of a lady called “Mimi Mac” by her grandchildren.

She apparently made a mean cobbler. You can tell when a recipe card looks like this, that it’s pretty good.

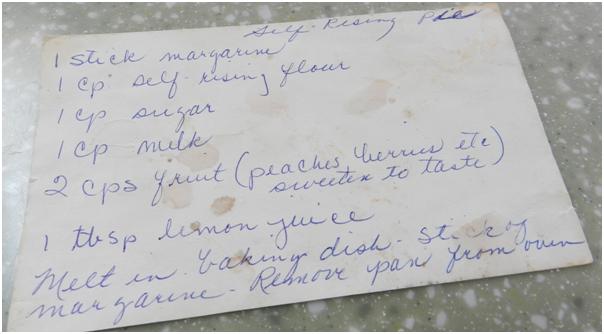
Here’s the Ariel font version of Mimi Mac’s Cobbler

1 stick of margarine (butter)

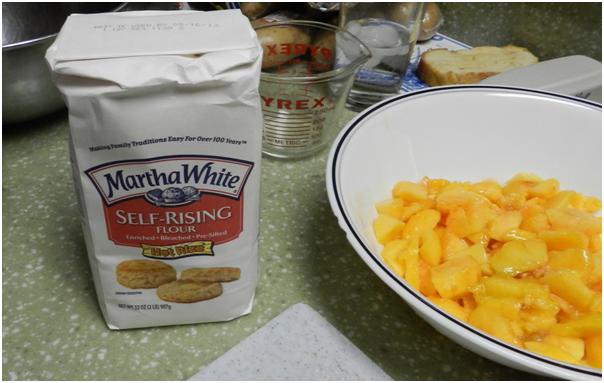
1 cup self rising flour
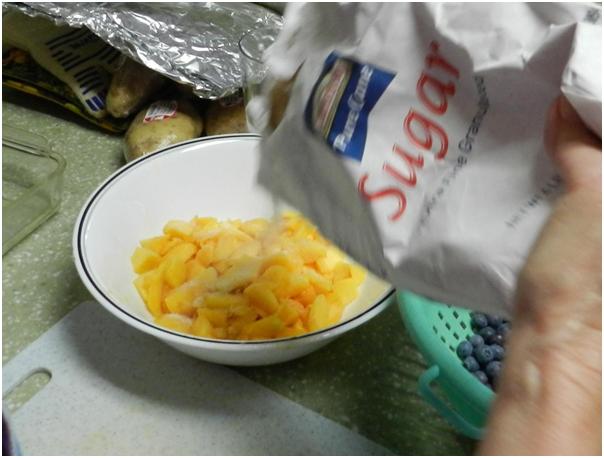
1 cup sugar

1 cup “milk” 2 cups fruit

1 TBSP lemon juice

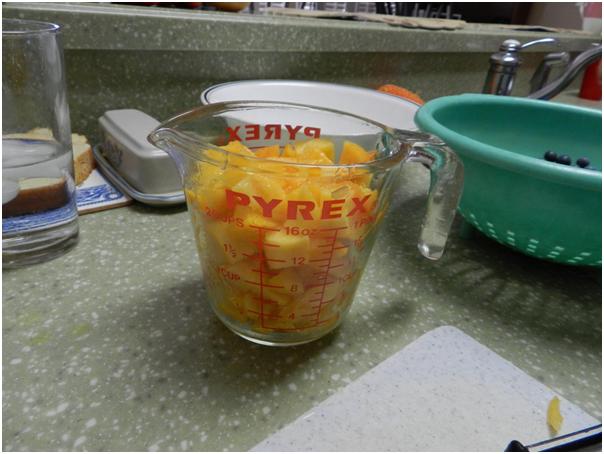
Prepare and sweeten your chosen fruit, then toss it in the lemon juice.

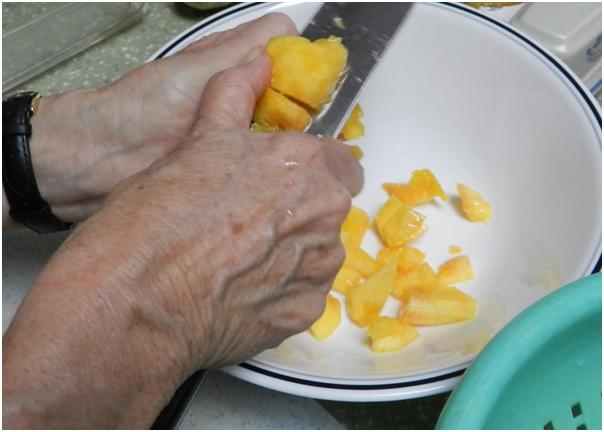
Peaches don’t stand a chance against a knife that size!

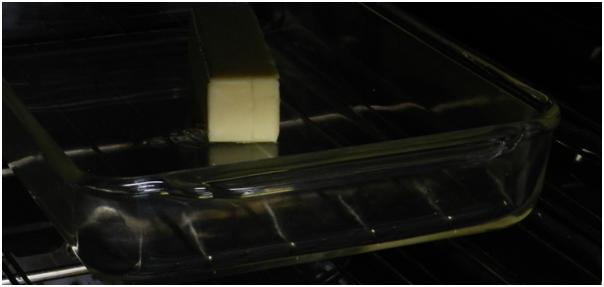
Melt the butter in a baking dish

While it’s melting combine the sugar and flour.

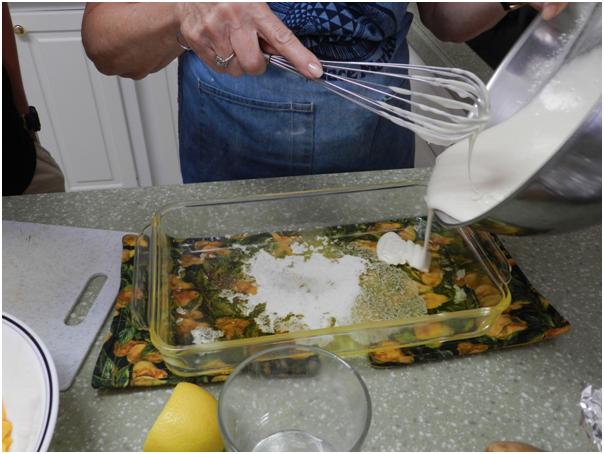
Then measure the “milk”. Now, does this next picture look like a picture of “milk” to you?

My dear mother in-law translates “milk” in his recipe as ½ cup of heavy cream and ½ cup of whole milk but even when asked, she still calls it “milk”. I told her that people might call that “half-n-half” but she shrugs and twists her hand in the air in this cute little gesture that she alone can pull off which roughly means “Oh, well!” She is so sweet! She will be downright adorable if she ever gets old but she’s in better shape than most people I know so she can just have her cream keep looking 20 years younger than she is.

Add the “milk” to the flour and sugar mixture.

And, whisk until smooth.

Let the baking dish with the melted butter cool slightly. Then pour the batter over the top. Do not stir it together with the butter. NO STIRING allowed! (Make sure your grandson understands!)

Drop the fruit evenly over the batter. Still, NO stirring.

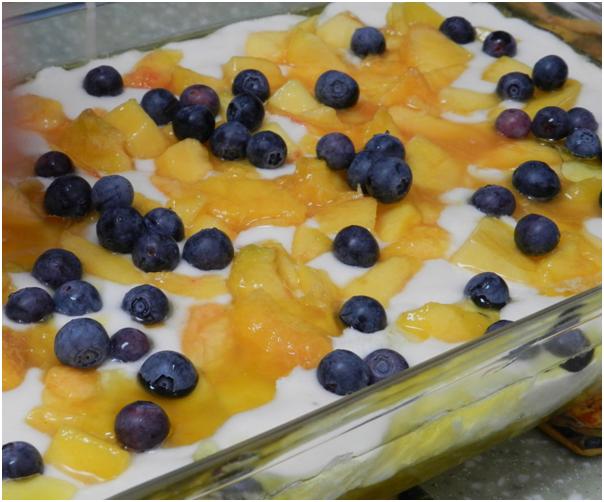
Bake at 350 degrees for 40 minutes. Give it a few minutes to cool…then dig in.

I must say, that left to my own devices, the dish would have been twice as big and I would have had a big wallop of extra creamy vanilla ice cream on top, but Mimi looks as good as she does for a reason. Moderation is her mantra. So, I behaved with decorum and took an overnight break before I ate what was left in the pan for breakfast. I ran first though, so… Anyway, doesn’t this look delicious?

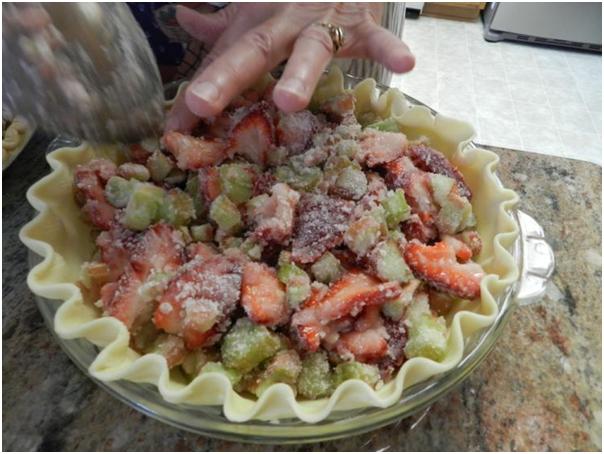
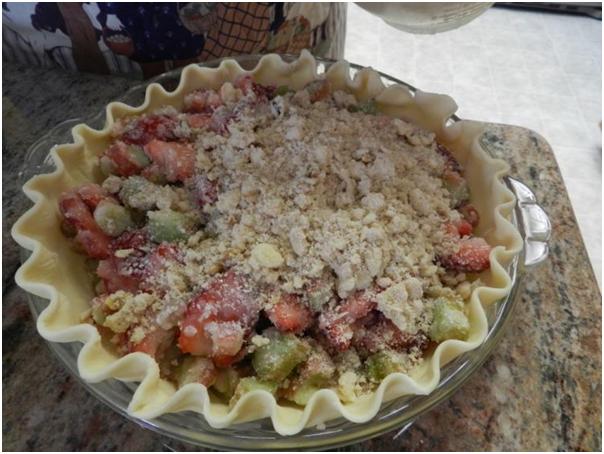
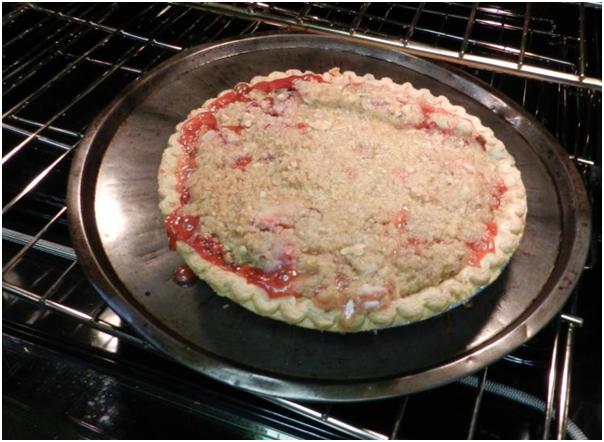
If you’re keeping track, you realize there’s a missing cobbler, which brings me to tonight. I am now at my brother’s house where I used most of that big beautiful box of peaches to bake another cobbler. This one was a different style though. Mimi Mac’s is probably more of a true cobbler – sort of a cross between a cake and a sweet sticky biscuit that rises up around the fruit. On the other hand, the one I made tonight called for the peaches to be treated more like a pie filling and had a crispy crumbly crust on the top. I think it was probably more of a “crisp”. Whatever it was, I’m thankful that with 8 kids in the house there’s just enough left for my breakfast.

Which style do I like better?

Both.

Variety is the spice of life.

Thank you again, Charlotte and Barney, for a lovely visit, for spoiling me once again in your relaxing home, and for the wonderful peaches.

Strawberry Rhubarb Pie

My mother made Strawberry Rhubarb Pie a few weeks ago and made the mistake of mentioning it to me on the phone. What she forgot was that my Dad would be driving to Pullman two days later. I spent those 48 hours campaigning for her to send “a piece” to me and reminding him. Really, I meant for her to send about half the pie but she sent me exactly one piece. I snuck it into the office and ate it all by myself without offering to share any with my family. So, maybe I shouldn’t be judging mom’s sharing technique especially after she went to all the trouble to make it again for our last night in Eastern Washington.

I had just left Ric alone with the movers after a dresser being driven across the lawn on a dolly started losing all of its drawers into the grass. It’s just best for me not to watch some things, so I went up to Spokane where the boys were already staying with my parents. I got there just in time for the pie making, so I got out my camera. She was actually making three pies. In my economy they were to be divided thus: one for me, one for everyone else and one for the neighbor who gave her the rhubarb.

She had already started chopping the rhubarb by the time I set down my purse. I liked the color of this batch and it packed a healthy rhubarb sizzle in every bite.

She also had the crumb topping ready, but I had her pose with the pastry mixer anyway.

She let me slice the strawberries.

But, Mom took care of the crust. She is much better at shaping the edge than I am…so are most people.

Then, she added the flour and checked in with the aged cookbook she got for a wedding gift from her grandmother, (my Great Grandma Quantz). She doesn’t really follow the recipe as much as she thinks she does though. I guess it just jogs her memory. The recipe at the bottom of the post is how she actually makes the pie.

Here is the cookbook dated from the late 60s. It calls for “Regular Gold Medal Flour or Wondra” in most recipes. What is Wondra, I wondra-d?

After the cookbook consultation, we dumped in the pretty strawberries.

…and mixed the filling together gently.

I really like the old pastry mixer that I grew up with, which is why I stuffed it in my suitcase and left for the East Coast with it. (Just joking, Mom. Don’t get up and look!)

The filling is put into the crusts looking like a bunch of freshly sugared fruit. It was very pretty and I was surprised that was all there was to the process. I thought there would be a sauce involved for some reason. It certainly comes out of the oven differently than it goes in.

The crumb topping is Mom’s twist on the pie and I like it.

She puts a pan under each pan for the oven because there is a tendency to drip.

She also makes aluminum foil collars to keep the edges of the crusts from overbrowning.

Three strips of foil folded together into one long strip and then turned into a loop and pressed around the edges. I have visions of cutting my fingers on the foil just thinking about this process, but it really does help on pies that have to bake for a long time.

Here is one of the pies, with its collar off, showing us why she put the pan under the pan. See how clean my Mom’s oven is? No rhubarb drips allowed! (Notice you never see pictures of my oven, because I do things like drop pesto pizza into the hinge!)

Here is my pie. It was yummy. I ended up sharing – which was Mom’s plan all along but Oh, My! It was delicious.

I was so intent on the zingy goodness that I almost forgot I meant to post this culinary experience. So, final photo has a few bites missing from the side.

Here’s the recipe for one pie:

Filling

1 ½ cups sugar

1/3 cup flour

2 cups rhubarb

2 cups strawberries

Crumbled Topping

¾ cup flour

1/3 cup butter

1/3 cup brown sugar

½ cup chopped pecans or walnuts

Crust
Any single crust recipe or pre-made will do

Bake at 425 for 40-50 minutes until filling is bubbly.  Let it cool and set before attempting to slice.

Thanks for the pie, Mom!

Pesto Pizza

Here’s a quick and easy favorite that my friend Shannon Cummins introduced me to a few years back.

It takes…

1 pre-baked pizza crust

¼ cup pesto (more or less)

1 cup chopped cooked chicken

4 oz crumbled feta

1 chopped Roma tomato

½ cup shredded cheddar cheese

Salt and pepper to taste.

Optional – Chopped Portobello mushrooms, olives, onions…this is pizza. You get the idea.

Spread the pizza crust with the pesto. You can make your own or buy it in a jar. (This fall I will be making and freezing pesto again, so check back if you want to see how it’s made – and frozen in bags like you see in the picture above.)

It smells delicious to open a bag of pesto! Next comes the chicken.

Then sprinkle on the feta.

Top with well drained tomatoes.

Add the cheddar and then sprinkle with salt and pepper to taste.

Bake in a 375 degree oven for about 12 minutes.

Blog Outtake: I was baking one regular and two small pizzas when I took these photos. Apparently my cookie stone was offended by the idea of hosting pizza and it spit one off the edge as I took them out of the oven. It was LOVELY to have a piping hot pile of feta, chicken, tomatoes and cheddar in the hinge of my oven door, not to mention what it did to the oven mitt I was using in a futile effort to clean it up. I thought about taking a picture, but I wasn’t quite in the right frame of mind, and you really wouldn’t want to see something that ugly anyway, right? I spent a good portion of yesterday morning trying to pick the last bits of hardened cheese out of the fabric cording that seals the oven door but I’m afraid our renters may still be able to find evidence of the wreck that happened with pesto pizza if they look closely.

Nomad Libs – Move Story Complete

The story of our move to New York is now complete on Nomad Libs.  Click the link in the menu bar at the top of this blog  if you’d like to read about a dog “episode” in the car, Lisa plus Eight, courthouses, dolphins and other adventures during our 5,200+ miles of wandering this summer.

Joy to You,

Lisa


Wanna-Be Food Blogger Nabbed by the CIA

Molly and I visited the Apple Pie Café at Culinary Institute of America in Hyde Park, NY yesterday. I guess I missed the signs that said I wasn’t supposed to take pictures. When I snapped one right under the nose of the man standing behind a case full of treats I was informed of the policy. I apologized and put my camera/phone away. (Maybe next time I’ll print up a Kitchen Catwalk press pass and wow them with that…if I can keep a straight face.) Fortunately, I had already stored a few shots and the kind gentleman didn’t seem troubled by that, so here are the ignorance-is-bliss images.

Do you see any signs that say no cameras?

Toasted Meringues. These got the camera binge started – like photographing clouds indoors.

I was mainly focused on the cookies in the bottom row. They looked pretty good. I’m going to work on a brownie-like cookie next winter and the Ranger Cookies beside them caused Molly to recall a recipe that she has in a box at home that needs to be tried again. See…this was official blog work.

The baguettes looked delicious but they were not actually twinkling. That was a special and totally intentional camera effect I was after.

This was the shot that got me nailed. I can’t even identify most of the items in this picture. You could water board me and I wouldn’t be able to give up the culinary secrets contained here. I will however tell you to go and try some of these. The students and staff are lovely and charming and the food was wonderful.

No more photos.

Visualize with me: for lunch, I ordered a Portobello sandwich with soft goat cheese, red onions, and baby spinach tossed in balsamic vinaigrette and Molly got oven-roasted turkey with gruyere cheese, cucumbers and chipotle mayonnaise. We traded halves so we each got both. (Kids, these were no PBJ’s!)

We were full and happy after the scrumptious sandwiches, but we are Americans. We push through the satiation point and move on to dessert!

Okay, two more photos.

It started innocently. I had a legitimate reason to pull my phone out of my purse. I was nearly 3000 miles away from my family. Then I reasoned that these were my cupcakes. I bought and paid for them (well, actually Molly did, but my point remains). I could take their sweet little pictures if I wanted to. So, I bravely pretended to be texting in order for you to see the Brownie Cupcake with fudge frosting and the Pink Lemonade cupcakes that we shared.

The frosting was so light and fluffy on these little dabs of decadence. Molly says she’s going to learn how to make this sort of frosting and she bought a camera today. Maybe she’ll share her wisdom one day.

I am going to find sugar crystals like this before molasses sugar cookie season starts.

Here we are in front of the Culinary Institute Restaurant building’s front entrance. How many homeschooling moms does it take to take a self-portrait with an i-phone?

Here’s the view we were facing. The CIA campus is beautiful. If you ever have a chance to visit, it’s worth the trip.

While we were in the neighborhood it seemed rude not to stop and visit the Roosevelt’s.

What do you think of this recipe for fruitcake, Mr. President? (Fruitcake was one of his favorites.)